You’re in the right spot if you want to schedule a Microsoft (MS) Teams Meeting. These steps show you how to use the MS Teams interface rather than Outlook to schedule a meeting on your calendar. Don’t worry, it’ll still show up in your Outlook calendar.
Here’s how to schedule a meeting on your calendar and invite others to a MS Teams room where you can talk, chat, video, and collaborate like never before, all virtually.
Schedule a MS Teams Meeting Process
Step 1: Click the Calendar tab.
Step 2: Click the New event button.
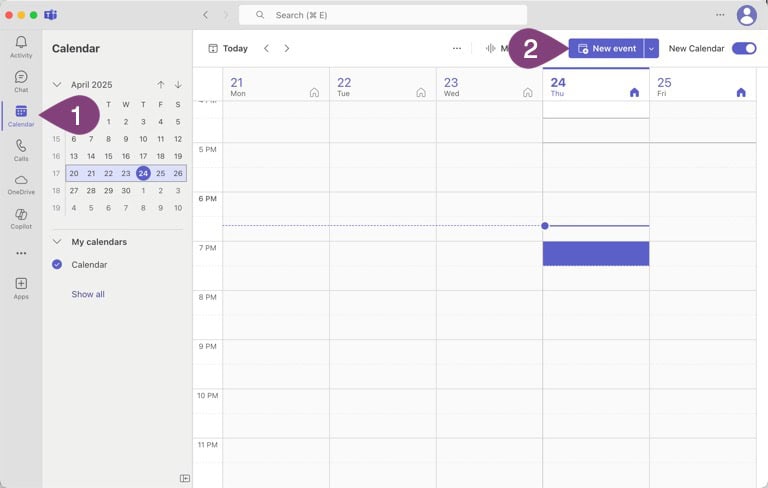
Now it’s time to set some basic information for your meeting, such as the title and who to invite.
Step 3: Name your meeting something meaningful to attendees.
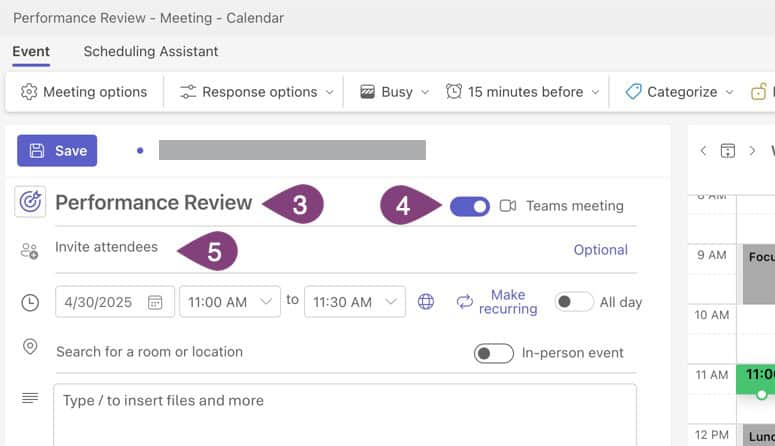
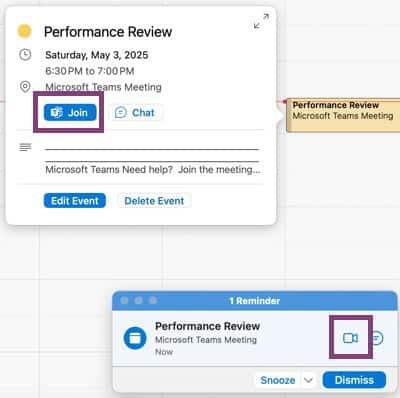
Step 4: Select this toggle to have Teams automatically put a Meeting Link in the invite and add buttons to join the Teams Meeting virtually from the calendar (in Outlook and Teams) and meeting alerts in Outlook.
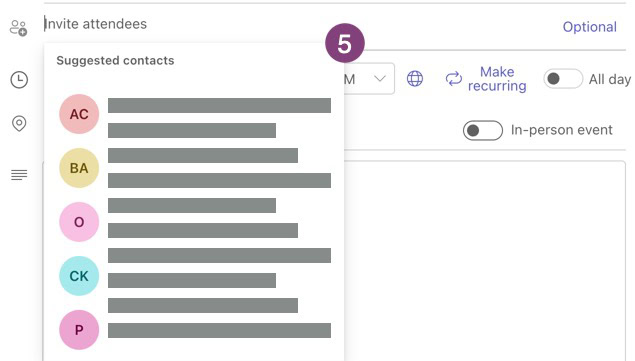
Step 5: Type an attendee’s email address or name if they’re in your address book or global address book. MS Teams will automatically show suggested contacts (see below). You can add as many attendees as your Microsoft 365 plan allows.
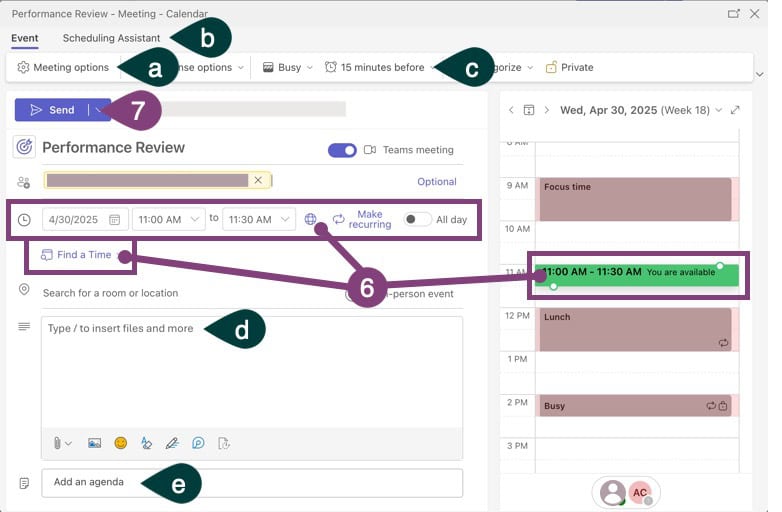
Step 6: Use any of the three options to select the date and time.
Select a Meeting Date and Time
Option 1: Use the date and time drop-downs.
Option 2: Click the Find a Time button, and MS Teams will try to find a time when everyone is available. This only works when you can see attendees’ availability.

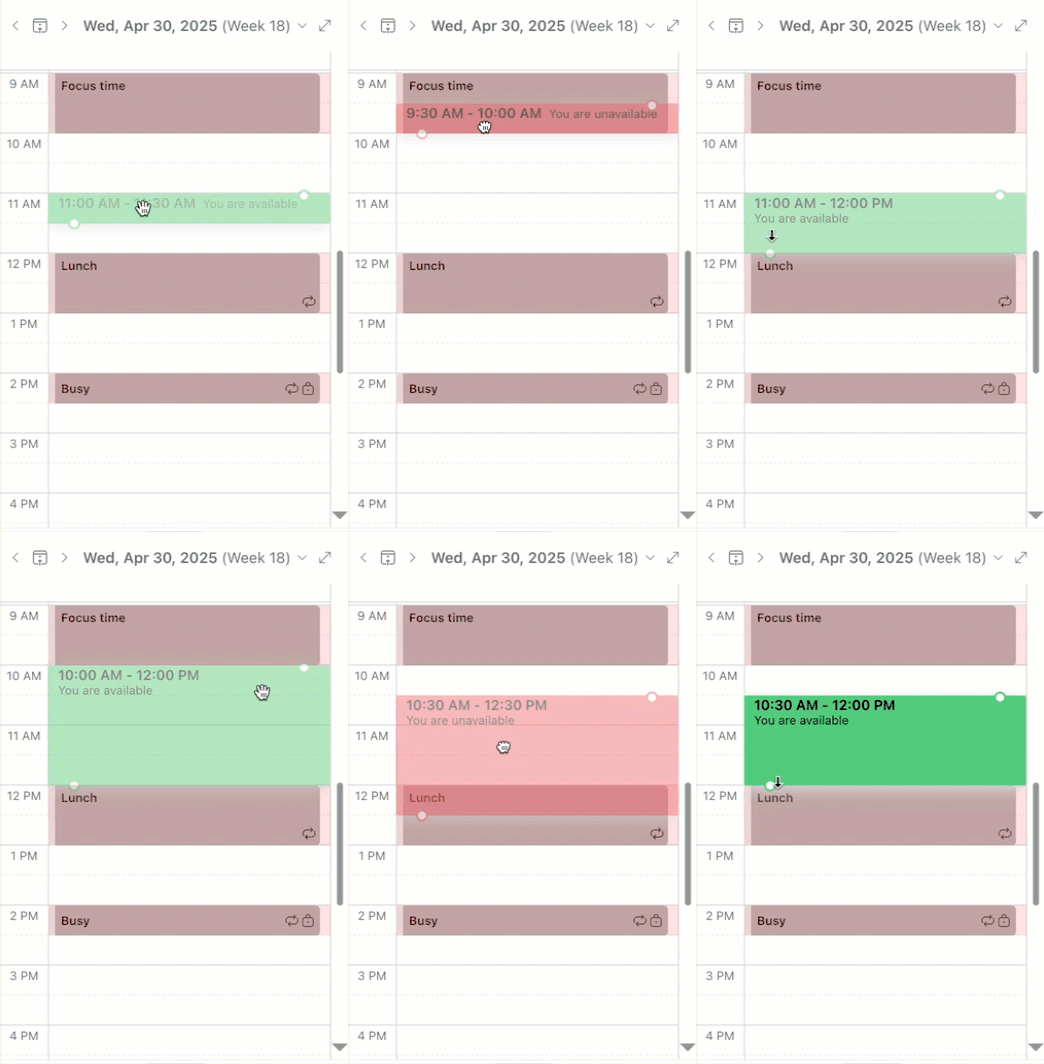
Option 3: Drag, drop, and expand the block on the calendar view. Green means there’s no conflict, red means there’s a conflict.
Step 7: Click the Send button.
That’s it! Your meeting invite will be sent to the attendees you invited. They can RSVP to the meeting by clicking the Accept, Tentative, or Maybe buttons (Outlook) or Yes, Maybe, No buttons (Google) in their email.
Additional MS Teams Meeting Options
There are many other options for configuring your meeting before sending it, which are noted in the image above. Here’s what some of those options do.
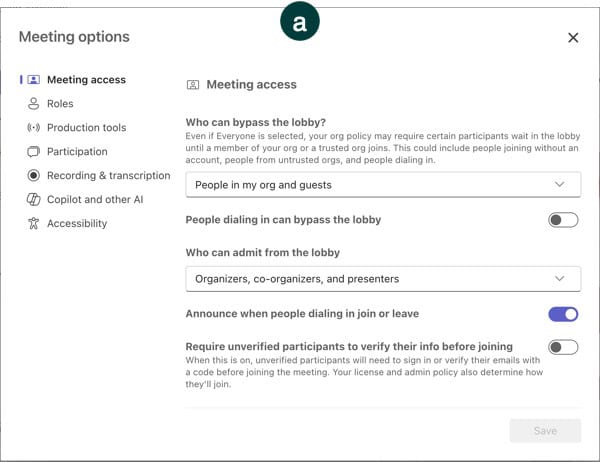
Label a: You can set more options for the meeting, such as if there’s an audio alert when attendees join, who can bypass the lobby, and many other options for a more professional or possibly larger meeting.
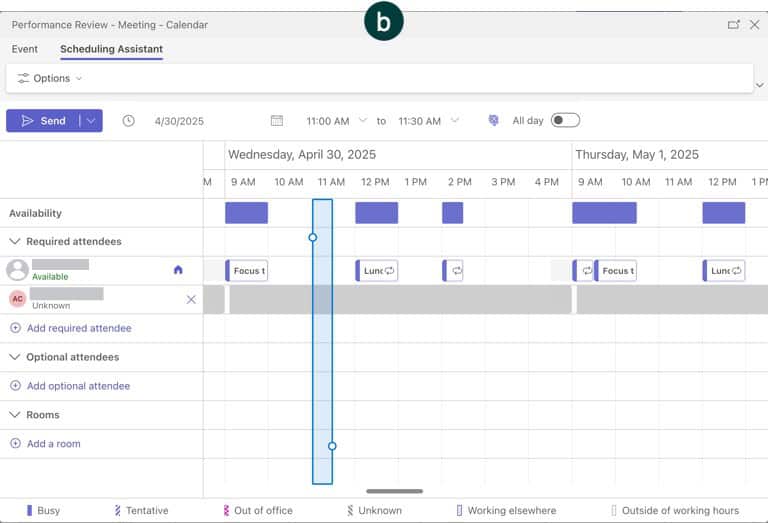
Label b: This is another option for finding the right time. It shows you rows with all attendees and their available time. This is a good way to find a gap among all attendees and visually see it.
Label c: This lets you change when attendees get alerted of the meeting before it occurs.
Label d: You can type a note about the meeting’s topic, upload files, and more. MS Teams automatically adds a link to the Teams room in the email, so no need for you to do that. This becomes part of the body of the email sent to attendees.
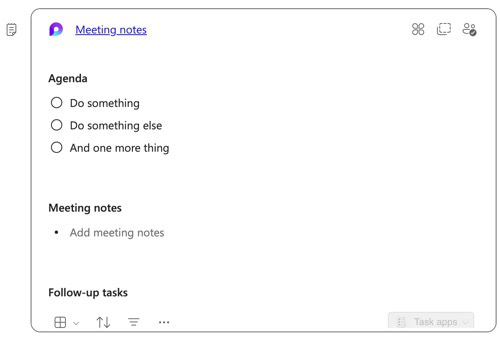
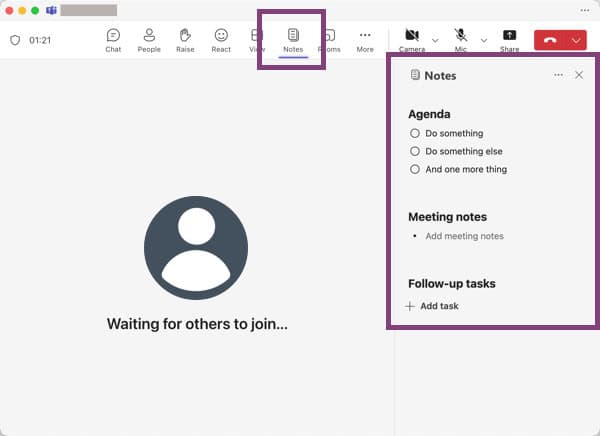
Label e: This adds a dynamic agenda element to the meeting (Microsoft calls it a loop) that only shows up in MS Teams. You can add agenda items, take meeting notes, set follow-up tasks, or add custom components.
The agenda can be accessed anytime by opening the meeting in MS Teams once the invite is sent. It will also appear as a panel once the meeting starts, but only you can access it unless you share it (a process we won’t cover here).
Now you’re ready to schedule a new Microsoft Teams Meeting and configure some advanced features. Congratulations on becoming an expert at starting a MS Teams Meeting.